This article was last updated on November 11, 2024 to include best practices for collaboration and security in cloud-based development environments.
Introduction
Programmers and software engineers spend a significant proportion of their time using IDEs and text editors for writing code. Most IDEs and text editors, such as VS Code, Sublime Text, and Notepad++, are desktop applications. However, there are also several online editors that you can use for building, testing, prototyping, and showcasing simple hobby projects, especially in web development.
This article will introduce you to some of the most popular free online Editors and IDEs, such as CodeSandbox, Codepen, JSFiddle, StackBlitz, Glitch, and Repl.it. You can use some of these online IDEs and text editors to build simple front-end applications, while others, like Glitch, are for both front-end and full-stack applications.
Your choice of an online IDE largely depends on whether you want to build a front-end, back-end, or full-stack application. We will explore the pros and cons of these IDEs and text editors.
It is worth pointing out that this article will explore the main features of the most popular online editors and IDEs. It will not identify which editor is the best. We will also go above and beyond to explore the strengths and weaknesses of each editor so that you can choose one which meets your needs.
Steps we will cover:
- What Is an Online Code Editor
- Why We Need Online Code Editors
- Bootstrapping a project for demonstration
- Top free online Editors and IDEs with free plans for hobby projects
- Comparing top online Editors and IDEs
What Is an Online Code Editor
In simple terms, an online code editor is a web-based tool for developers to write, edit, and test code in their browsers. These online code editors come packed with features for languages and all the other features of the conventional text editors.
The unique feature of online code editors, different from the traditional stationary IDEs, is the fact that no setup or configuration is required on the system, thus making it easily available and user-friendly. Just for this reason, online code editors can be invaluable in the case of needing people to work collaboratively on the fly over the particular piece in which you are interested.
In other words, you are able to quickly build prototypes or entire projects in a really powerful and flexible coding setup.
Why We Need Online Code Editors ?
Online Code Editors have been growing important due to a number of reasons:
Accessibility: Any device with an internet connection can write and test code through an online code editor. That means there's no need for a specific setup or powerful hardware in order to make coding accessible.
Collaboration: Most of these online code editors allow the feature of real-time collaboration, meaning a lot of developers can work on a project at the same time. This helps a lot for team projects, pair programming, and in most educational setups.
Convenience: No software installations and configurations are required on your machine. Online code editors come pre-installed and pre-configured, so they save you time and save you from managing many development environments.
Cost-effective: Most of the code editors available online come for free, or they have a free tier attached to them, which makes them a cheaper solution for all individual developers and organizations, especially those working on a tight budget.
Version Control and Backup: Most of the online editors are well integrated with the likes of Git, which makes it very easy and smooth when it comes to version tracking and collaboration. Besides, the code is usually automatically saved to reduce the danger of losing information.
Learn and Experiment: Online code editors are the easiest means to get coding for novices without all the hassles needed for setting up a local development environment. They are also perfect for experimenting with new languages or frameworks.
In other words, online code editors are flexible, collaborative, and accessible, hence improving one's productivity, and developers of all levels find it convenient to write code.
Bootstrapping a project for demonstration
It is possible to import a project from your local machine or Git hosting service like GitHub to some online text editors or IDEs. Therefore, we will create a basic Refine application in this section. We will use this application for illustration.
Refine is a React-based framework for developing web applications. It is useful when developing data-intensive CRUD applications such as admin panels and dashboards. Follow the steps below to bootstrap a simple Refine application using superplate.
How to create Refine application
The easiest way to start using Refine is to bootstrap an application using Refine CLI.
npm create refine-app@latest
You must respond to the command line prompts. You can also choose the default options throughout if you wish.
After successfully creating the Refine project, navigate to the example-project project directory using the command below.
cd example-project
To be sure the project you created is working, use the command below to launch the development server.
npm run dev
The above command will launch the development server on localhost. You can host the project on GitHub to import it to some of the online editors we will explore in the sections below.
Top free online Editors and IDEs with free plans for hobby projects
You will explore the most popular online editors and IDE's with generous free plans in this section. The focus will be more on editors and IDE's like Codepen, CodeSandbox, StackBlitz, and JsFiddle, primarily for building front-end projects, but we will also explore others like Repl.it and Glitch.
We will go above and beyond to highlight the pros and cons of online text editors and IDE's.
Codepen
CodePen is one of the most popular online text editors for building, testing, showcasing and discovering simple front-end projects built using HTML, CSS, and JavaScript. Several developers use it for sharing fun front-end projects. Therefore, you can use some of the Codepen projects for inspiration and learn from the different front-end web developers and designers.
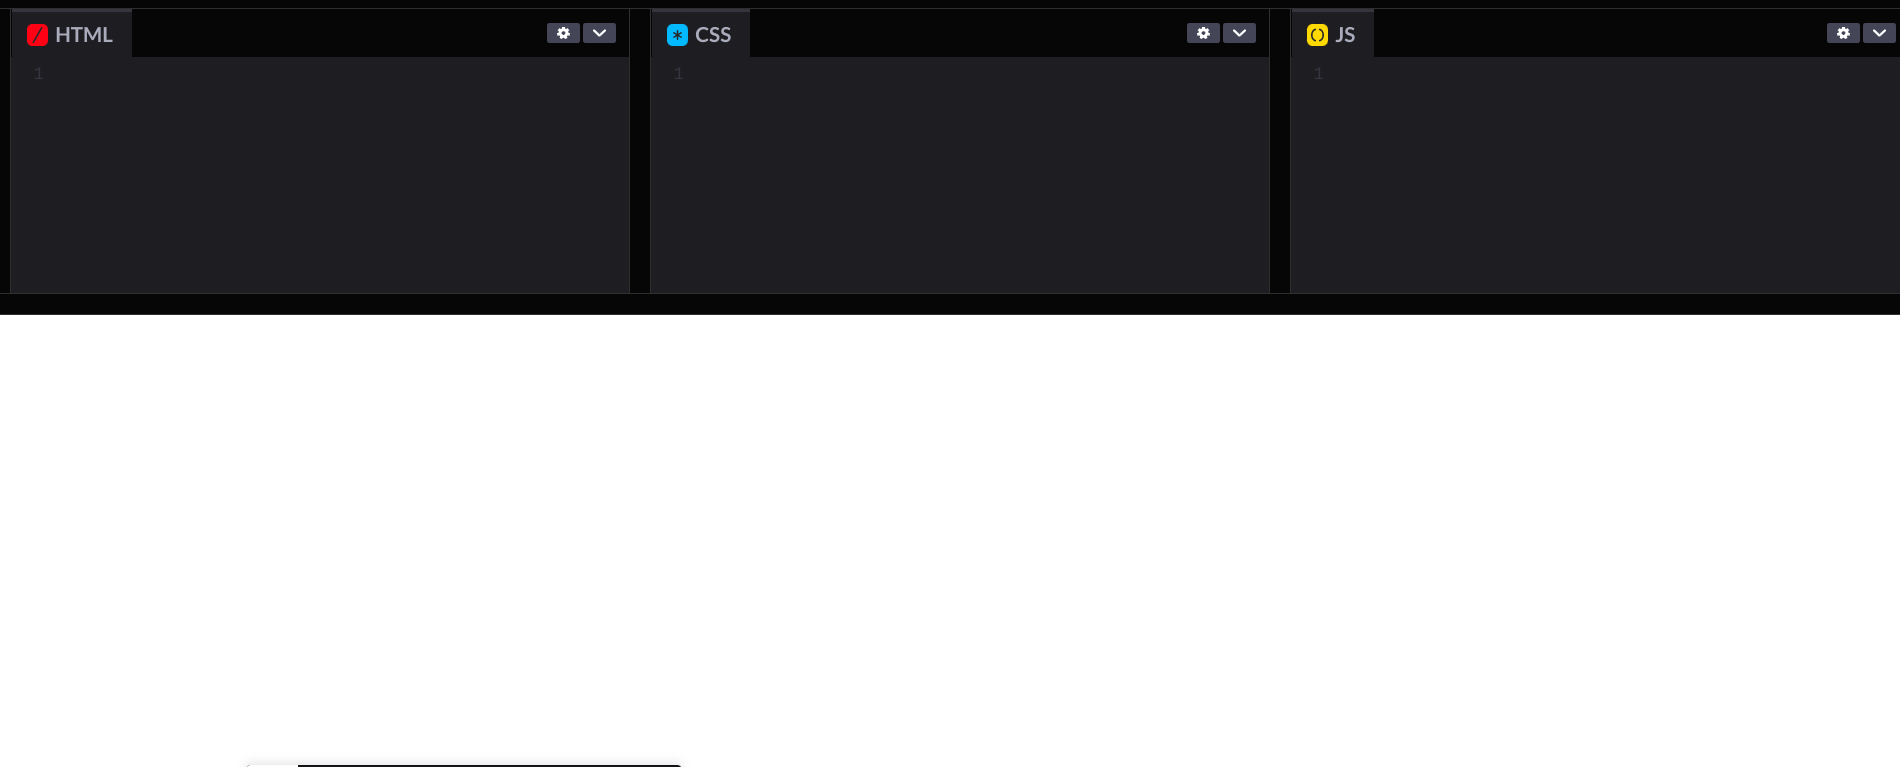
To start using Codepen, sign up using your e-mail id, Facebook, Twitter, or GitHub account. After login, type your HTML, CSS, and JavaScript code in their respective panels. Codepen will automatically update the preview. You can also change the default behavior in the settings.
Pros of using Codepen
- It offers generous free plans sufficient for simple hobby projects
- It has an excellent documentation
- Possible to embed pens in blog posts and documentation
- It has asset hosting services though it is only for the paid plans
- It supports several HTML templates and CSS Preprocessors
- It supports programming languages such as JavaScript, TypeScript, CoffeeScript, and LiveScript
- It has built-in support for the Babel transpiler
- Built-in features for syntax highlighting and code formatting
- Built-in support for code auto-completion
- You can use JavaScript packages via Skypack CDN
Cons of using Codepen
- You can't import projects from Git providers like GitHub, GitLab, and BitBucket
- You can't upload a project from your local machine to Codepen like with CodeSandbox
- It is not possible to interact with Codepen from the command line like with CodeSandbox
StackBlitz
StackBlitz is another online IDE tailored for web development. It uses WebContainers. In addition to supporting static projects built with HTML, CSS, and JavaScript, StackBlitz also supports most of the popular JavaScript and Node frameworks.
Additionally, you can start a new project by connecting a GitHub repository or uploading a project from your computer. StackBlitz also has several project templates to get you up and running instantly. You can use StackBlitz to create front-end, back-end, and full-stack applications.
To start using StackBlitz, sign in using your GitHub account. You can create a project quickly using one of the available templates. We will import the example project from a GitHub repository in the section below.
As a Refine team, we use +100 example code projects on StackBlitz to showcase the features of the framework.

How to open a GitHub repository in StackBlitz?
Instead of using the starter projects to create a new project on StackBlitz, you can import a GitHub repository. Follow the steps below to import the example project we created above.
Deploy the example project to GitHub
Host the Refine example project we created on GitHub. You can also use one of the tutorial examples if you don't want to deploy the example project.
How to open a public GitHub repository in StackBlitz?
You can open a public GitHub repository in StackBlitz by adding the GitHub username and the repository name like so:
https://www.stackblitz.com/github/{GITHUB_USERNAME}/{REPOSITORY_NAME}/{BRANCH|TAG|COMMIT}
You can also specify the script in your package.json file StackBlitz will use to set up the development serve as a query string. In the example below, StackBlitz will use the dev script.
https://www.stackblitz.com/github/refinedev/refine/tree/master/examples/tutorial-antd?view=preview&theme=dark&codemirror=1
You can open one of the tutorial examples in StackBlitz by following this link.
Pros of using StackBlitz
- StackBlitz has a generous free plan
- It supports both front-end and back-end projects
- It has support for popular front-end and back-end frameworks
- It has an excellent documentation
- Good community support
- It is possible to launch a project from GitHub
- You can run StackBlitz projects offline
- It is fast
Cons of using StackBlitz
- Not all web browsers fully support WebContainers. You might run into some errors if you intend to embed StackBlitz projects in documentation or blog posts
CodeSandbox
CodeSandbox is another online editor for building front-end and full-stack web apps. It is handy for quickly prototyping, showcasing, and experimenting with new ideas and projects. You can also embed a sandbox in blog posts, documentation, and GitHub project READMEs.
Like StackBlitz, CodeSandbox has several starter templates to choose from when launching a new sandbox. It supports the most popular front-end frameworks like React, Vue, Gatsby, and Next.
To start using CodeSandbox, you can sign in using your GitHub, Google, or Apple account. You can create a new sandbox using one of the built-in starter templates or create a sandbox by importing a project from your local machine or a GitHub repository.
How to upload a project from local computer to CodeSandbox?
CodeSandbox has a command line tool for uploading a project from your local machine to CodeSandbox. Follow the steps below to use it for deploying the example project you created above.
Install the codesandbox command line tool
To upload a sandbox using a project in your local machine, install the codesandbox command line tool by running the command below on the terminal.
npm install --global codesandbox
The command above will install the codesandbox command line tool globally. To check if the installation was successful, run the command below on the terminal. It should display the version of the codesandbox command line tool.
codesandbox -V
Log into your CodeSandbox account from the command line
After successfully installing the command line tool described in the previous step, log into your CodeSandbox account using the codesandbox command line tool. Run the command below on the terminal.
codesandbox login
You need to respond to the command prompts after running the command above. The command line tool will open your default browser. After login, CodeSandbox will generate an authentication token. You will use the generated token to log into CodeSandbox from the command line.
Upload the project from local machine to CodeSandbox
After successfully installing the command line tool and logging into CodeSandbox as described in the previous sections, use the command below to upload the current directory to a sandbox. If you want to deploy a different directory, replace ./ with the path to the directory.
codesandbox deploy ./
How to import a GitHub repository to CodeSandbox?
Instead of importing a project to CodeSandbox from your local machine, it is also possible to import a GitHub repository. In the steps below, we will import the Refine example project we created to CodeSandbox from GitHub. Create a GitHub account if you haven't. You should also host the example project in a GitHub repository before following the steps below.
Log into your CodeSandbox account in the browser
You must first log into your CodeSandbox account. As pointed out above, you can log into CodeSandbox using your GitHub, Google, or Apple account.
Grant CodeSandbox access to your GitHub account
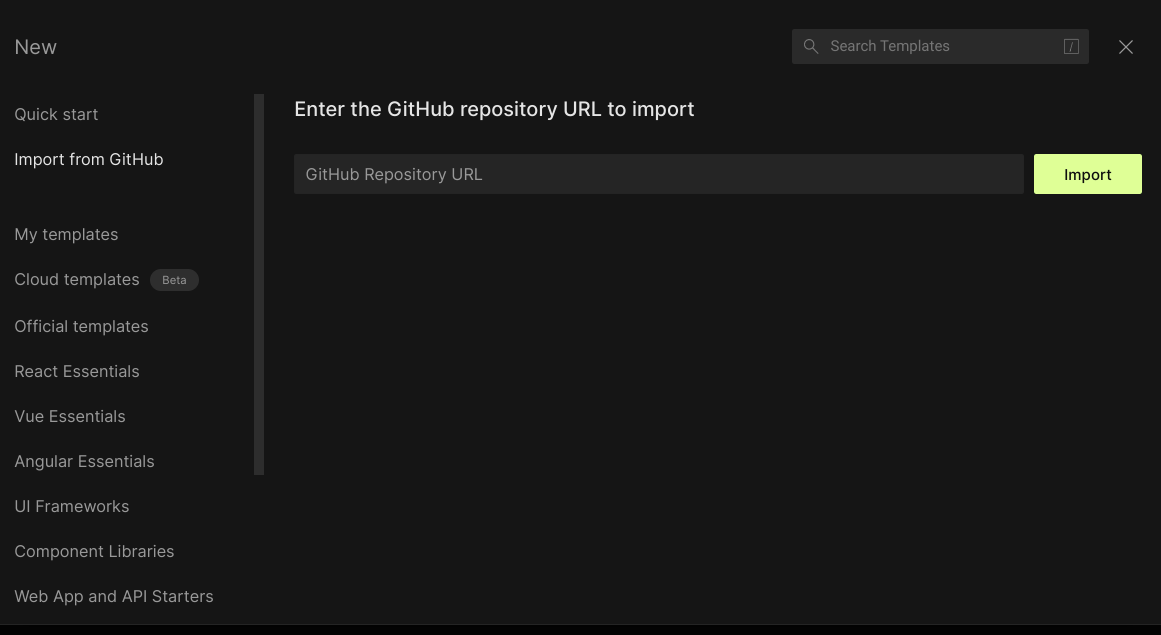
After logging into your CodeSandbox account, grant CodeSandbox access to your GitHub account. Click the button with three dots on the top right. In the drop-down menu, click Preferences and then Integrations. After that, sign into your GitHub account.
Import your GitHub repository
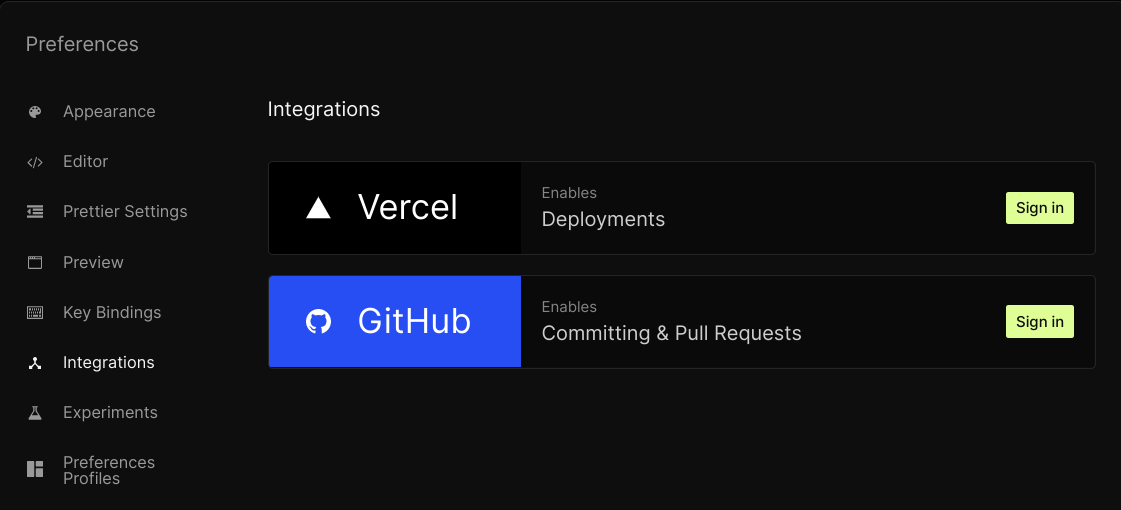
After successfully connecting your GitHub account as described above, you can import your GitHub repository by clicking the "Create" button at the top right. After that, select the "Import from GitHub" option. CodeSandbox will prompt you for the GitHub repository URL. Enter the GitHub repository URL and then click the "Import" button.
After completing the steps above, CodeSandbox will clone the Git repository and create a sandbox for you.
How to open a GitHub repository in CodeSandbox
The process of importing a GitHub repository to CodeSandbox described above requires you to log in and grant CodeSandbox access to your GitHub account. You can also open any public GitHub repository in CodeSandbox and fork it. Generate your sandbox URL by navigating to this page and pasting the URL for your GitHub repository in the input field. Use the sandbox URL to open the GitHub repository in CodeSandbox.
Open the Refine GitHub repository in CodeSandbox
Pros of using CodeSandbox
- It offers a generous free plan
- Good documentation
- It has built-in starter templates for most of the popular front-end frameworks
- It has GitHub integration
- You can import a project to CodeSandbox from the local machine using the
codesandboxcommand line tool - It is possible to embed sandboxes in blog posts, documentation, and GitHub project READMEs
- You can install and use NPM packages
- Built-in code completion and syntax highlighting
Cons of using CodeSandbox
- It doesn't support server-side frameworks like Express
JsFiddle
JsFiddle is a simple online editor and code playground for front-end developers and designers. You can use it to host simple project demos for your products and services and share code snippets. Additionally, you can embed your code snippets hosted on JsFiddle in a blog post, documentation, and GitHub README.
JsFiddle is very similar to Codepen. You can use it to work with HTML, CSS, and JavaScript. It also supports some of the most popular front-end frameworks like React, Vue, and Preact. You don't need to log in to start using JsFiddle. Navigate to the JsFiddle landing page to launch the editor straight away.
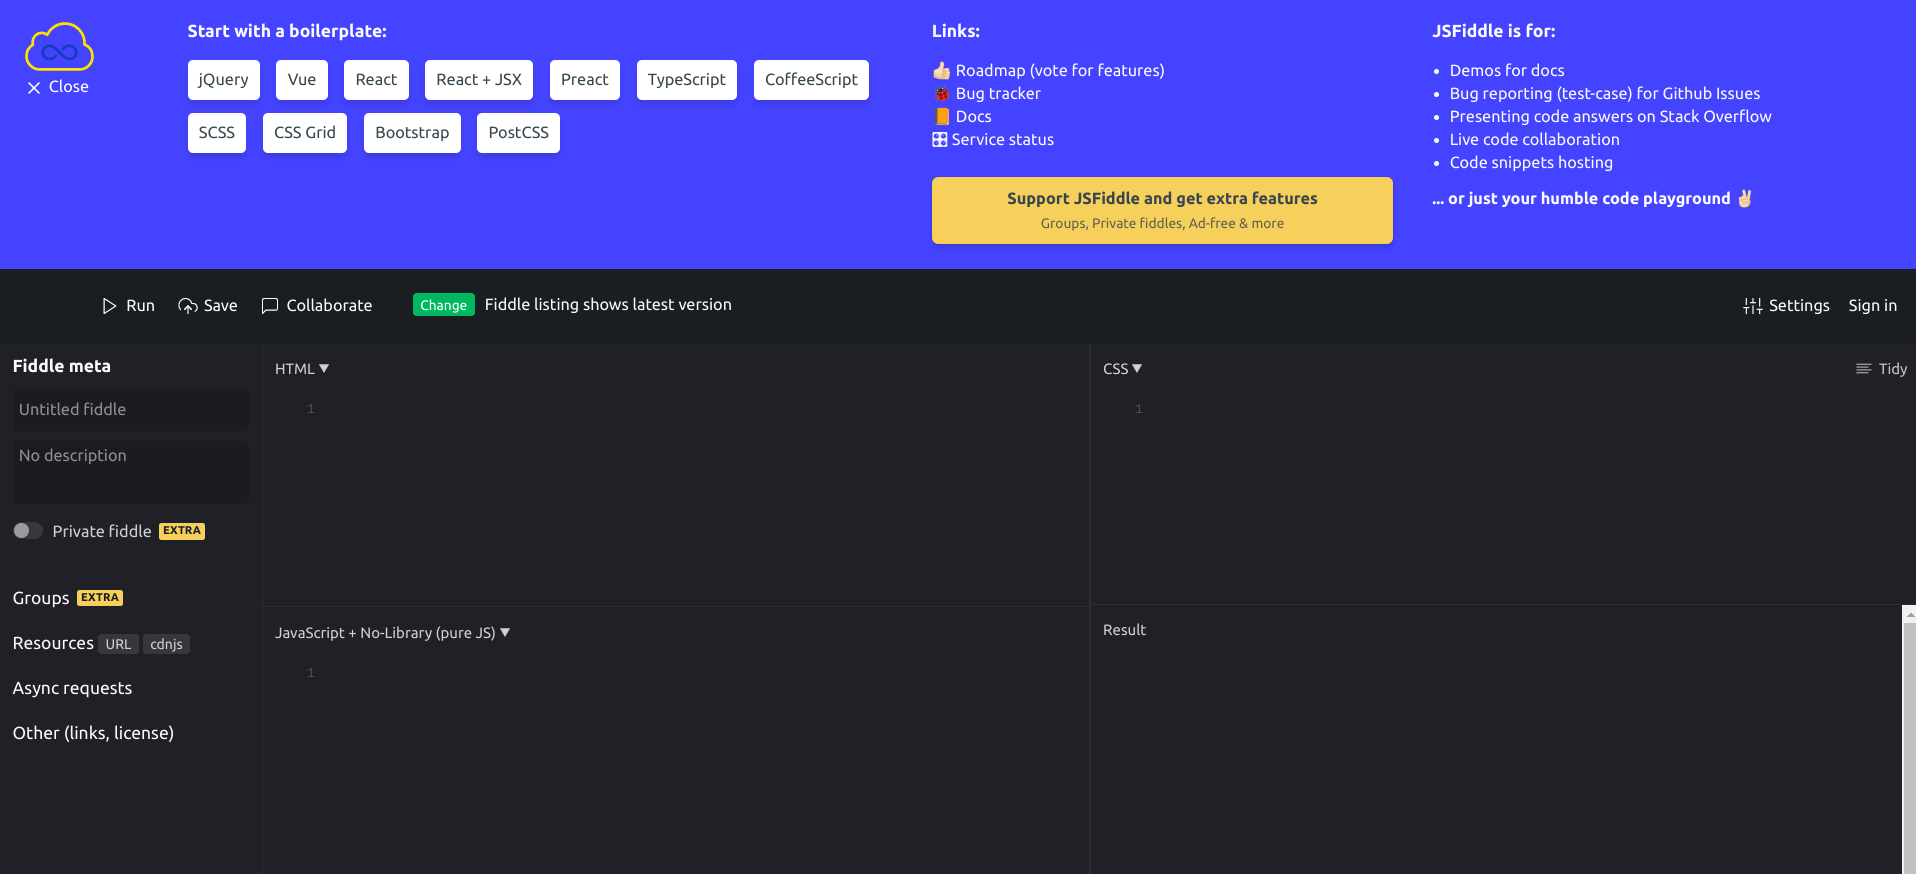
You can create a project using one of the built-in templates or work with the default setup which consists of HTML, CSS, and Vanilla JavaScript.
Pros of using JSFiddle
- It has a generous free plan
- It has good documentation
- It is excellent for sharing short code snippets
- It is possible to use libraries via CDN
- Possible to embed fiddles in blog posts, documentation, and GitHub README
- Builtin code completion
Cons of using JSFiddle
- Suitable only for simple front-end application
- It doesn't have a command line tool to interact with your account like CodeSandbox
- It is not possible to import projects from GitHub into JSFiddle
Repl.it IDE
Repl.it IDE is a collaborative browser-based IDE. It supports several programming languages and runtime environments such as Node, Python, C, Java, and R. Therefore, you can use the Repl.it IDE to build front-end, back-end, and full-stack applications.
Like most of the other online editors, Repl.it has several starter templates to get you up and running quickly. However, you can also import an existing project from a GitHub repository. To start using Repl.it, create an account using your email id or log in with your Google, GitHub, Apple, or Facebook account.
In addition to being an online IDE, Repl.it also has a vibrant online community from which you can get help and inspiration.
How to import GitHub project to Repl.it
You will import a GitHub project to the Repl.it IDE in this section. The steps below assume you are hosting the example project we created at the beginning of this article in a GitHub repository.
Log into your Repl.it account
Though anybody can view a public Repl, you need a Repl.it account to create one. As pointed out above, you can create a Repl.it account using your e-mail or log in using your Google, GitHub, Apple, or Facebook account.
Create a new Repl
In your Repl account, create a new Repl by clicking the "Create" button on the left panel or the top right. You can create a Repl from an existing template or import a project from GitHub. Click the "Import from GitHub" button.
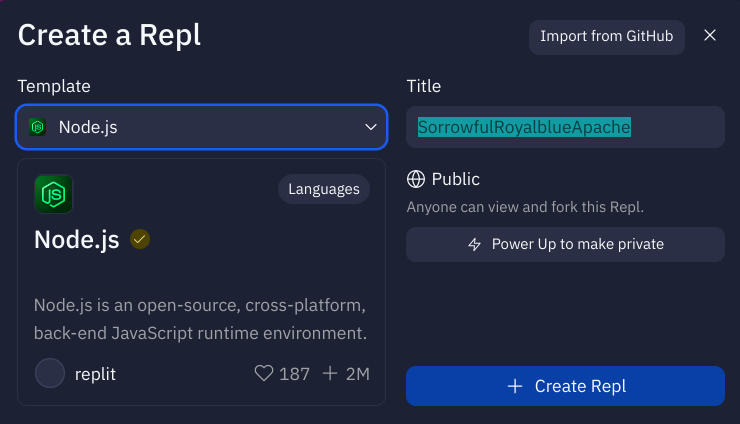
As you import a project from GitHub, be aware of the Repl.it resources limitations if you are on the free plan. You might need to upgrade to a paid plan for large projects.
Pros of using Repl.it
- Generous free plan
- Active community support
- Good documentation
- Supports multiple programming languages and runtime environments
- It provides GitHub integration
- Possible to upload files and folders from your local computer
- It is also a learning platform
- Offers simple Repl database for storing data
- Possible to embed a Repl in a blog post, documentation, or GitHub README
Cons of using Repl.it
- No command line tool to interact with Repl.it from the terminal
Glitch
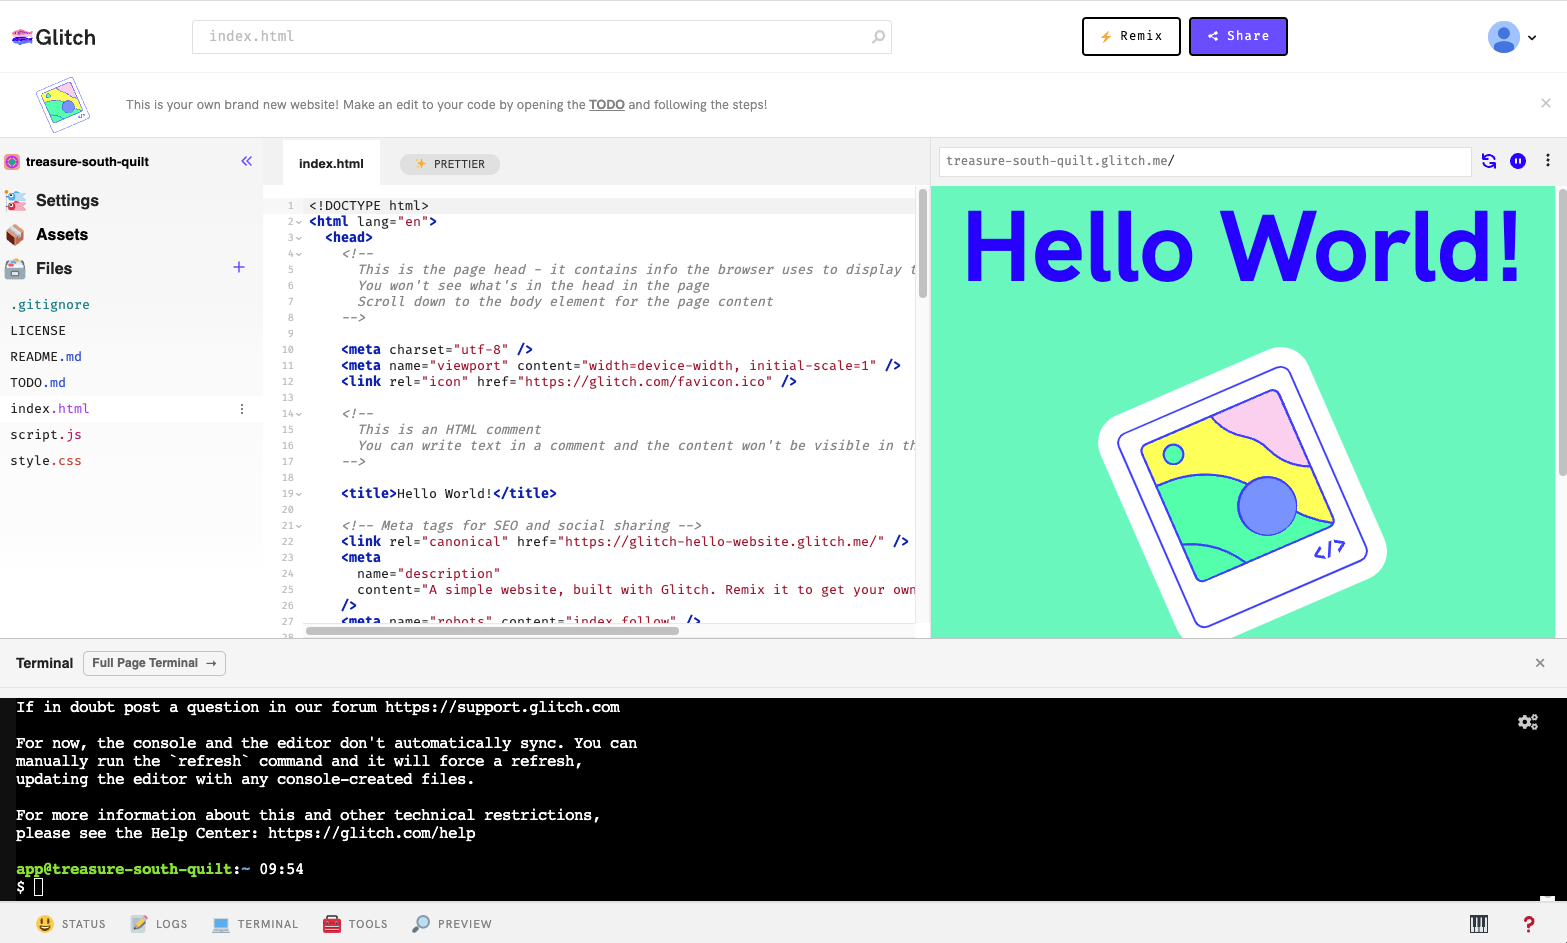
Glitch is another online editor you can use for front-end, back-end, and full-stack web development. Unlike Repl.it, which supports several programming languages and runtime environments, Glitch supports the Node runtime environment and front-end languages like HTML, CSS, and JavaScript. To start using Glitch, create an account using your Email, GitHub, or Google account.
You can use Glitch to prototype, share, and showcase web projects. Like most of the online editors I have highlighted above, Glitch has several starter templates you can use to start a new project or import a GitHub repository.
Select the "Import from GitHub" option when creating a new project. Enter the full URL of the GitHub repository. Glitch will clone the repository and create a new project for you.
Pros of using Glitch
- It has a generous free plan
- Good community support
- Good documentation
- Supports front-end, back-end, and full-stack applications with Node
- It has a built-in feature for implementing simple database with SQLite
- You can deploy from Glitch to Digital Ocean's App platform
- It is possible to embed Glitch project in a blog post, documentation or GitHub README
Cons of using Glitch
- Glitch is only for building front-end, back-end, and full-stack applications with Node. It doesn't support other languages or runtime environments
- You can't interact with your Glitch account from the command line like CodeSandbox
- For the free plan, your project goes to sleep for a duration of inactivity. Repl.it doesn't have that behavior
- The free plan has a limit of 1000 project hours per month
Comparing top online Editors and IDEs
The free online editors and IDEs highlighted above have similarities and differences. I will compare online editors and IDEs, highlighting a few similarities and differences in this section.
| CodeSandbox | StackBlitz | Codepen | JSFiddle | Glitch | Repl.it IDE | ||
|---|---|---|---|---|---|---|---|
| Offline usage | No | Yes | No | No | No | No | |
| Documentation | Good | Good | Good | Good | Good | Good | Good |
| Community | Good | Good | Good | Good | Good | Good | Good |
| Discord Support | Yes | Yes | No | No | No | Yes | |
| Pricing | Generous free plan | Generous free plan | Generous free plan | Generous free plan | Generous free plan | Generous free plan | Generous free plan |
| Front-end application | Yes | Yes | Yes | Yes | Yes | Yes | |
| Embed demos | Yes | Yes | Yes | Yes | Yes | Yes | |
| Back-end application | No | Yes | No | No | Yes | Yes |
Bonus: GitPod
Gitpod is an in-browser code editor with all the required functionality developers expect as an IDE or text editor to write code. This is in line with providing developers instant development environments in the cloud. Gitpod works seamlessly with repositories hosted on GitHub, GitLab, and Bitbucket, ensuring that you can start coding instantly.
Key Features of Gitpod:
- Ready Workspaces: Based on your repo or branch, GitPod prepares a full development environment ready to go.
- Cloud-based: All your work is stored on the cloud, making it possible to work on less powerful local hardware.
- Instant Setup: Gitpod is automatically installing all the dependencies and tools that one would need. It greatly reduces time spent setting up and configuring.
- Continuous Integration: Gitpod supports CI/CD workflows. Thus, you can test and deploy code changes quickly.
- Multi-Language Support: Gitpod supports many programming languages and frameworks, easing work with different projects.
- Easy Access: You can access Gitpod from any device using a web browser, so you can work from literally anywhere.
When Not to Use Online IDEs – Key Limitations to Keep in Mind
Here’s a breakdown of situations where online IDEs might not be the best choice based on project type, along with some key limitations. While platforms like CodeSandbox, StackBlitz, and Gitpod are fantastic for accessibility and collaboration, they do come with some drawbacks that can impact our workflow.
Key Limitations of Online IDEs
- Performance Constraints
- Limited Resources: Most online IDEs cap CPU and memory usage, which can slow down large applications or complex builds.
- Network Dependence: Heavy reliance on the internet is a drawback; any lag or downtime can disrupt workflow, whereas local IDEs offer more reliable performance.
- Limited Language and Framework Support
- Popular languages like JavaScript and Python are well-supported, but some specialized languages or frameworks may lack full support.
- This can limit projects that require specific runtime configurations unavailable on the platform.
- Restricted Access to System Resources
- Online IDEs often don’t allow access to certain local resources or custom libraries, which becomes an issue if a project needs hardware interaction or system-level tools.
- Security and Privacy Concerns
- Working with sensitive or proprietary data comes with cloud storage risks, even with security protocols.
- Local environments offer more control over data security, which is essential depending on project needs.
- Limited Customization Options
- Advanced configurations and custom plugins may not be available in online IDEs, limiting how we optimize the environment for high-stakes or complex projects.
- Local IDEs, on the other hand, allow for better customization to suit our workflow.
When to Consider Using a Local IDE Instead
- High-Performance Projects: For data-intensive work or those requiring high processing power (e.g., ML models), local development is usually the better choice.
- Large, Multilingual Projects: Projects with specific frameworks, languages, or complex build setups are better suited for local IDEs, which handle custom configurations more flexibly.
- Sensitive Data Projects: For projects involving customer or proprietary data, sticking to local environments is a safer choice.
- Offline Access: If we might need to work offline, a local setup is the way to go.
- Full-Featured Debugging: While online IDEs offer basic debugging, local options like VS Code or IntelliJ are more robust for complex debugging scenarios.
Security and Privacy Considerations to Use Online IDEs
I just wanted to bring up some key security and privacy considerations when using online IDEs. While these platforms are incredibly convenient and support collaboration, there may be some potential security and privacy risks in projects dealing with sensitive data or proprietary code.
1. Data Privacy Risks
- Cloud Storage: Most online IDEs store code and files in the cloud, which can expose our data to security breaches or unauthorized access.
- Third-Party Access: Some platforms use servers managed by third parties, raising risks if those providers don’t adhere to top security standards. Local environments give us more control over data security.
2. Limited Control Over Data Location
- Data Residency: For projects with data residency requirements (like GDPR), online IDEs rarely allow selecting storage locations, so sensitive data might be stored in regions with less stringent privacy laws.
3. Authentication Vulnerabilities
- Account Security: Many online IDEs rely on single sign-on (SSO) through GitHub, Google, etc. If these accounts are compromised, it opens up risks of unauthorized access.
- Two-Factor Authentication: Always enable 2FA on accounts tied to online IDEs to add extra security.
4. Risks to Public Exposure
- Shared Workspaces: Collaborative features in online IDEs can, if not set correctly, unintentionally expose code or data. Always double-check permissions on shared projects to avoid accidental public access.
5. Network Dependency for Security
- Unsecured Networks: Using online IDEs over public networks, like Wi-Fi, increases interception or attack risks. When working remotely, ensure you use a VPN and secure connections to protect data in transit.
When Not to Use Online IDEs for Security Reasons
- Highly Sensitive Data: Projects involving sensitive customer data or proprietary information are best kept in local environments, where we control access and storage.
- Regulatory Compliance Requirements: For projects with strict data residency or security standards, local IDEs help ensure compliance without third-party storage risks.
- Internal-Only Projects: For internal tools or codebases that shouldn’t be accessible outside the organization, local setups are a safer choice.
Conclusion
If you are a programmer, software engineer, or developer, online editors and IDEs come in handy for prototyping, experimenting, sharing, and collaborating on small projects. As explained above, there are several online editors.
These editors include StackBlitz, Codepen, CodeSandbox, JSFiddle, Glitch, and Repl.it IDE. Each online editor has its strengths and weaknesses. Codepen and JSFiddle are suitable for small front-end projects built using HTML, CSS, and JavaScript.
On the other hand, you can use either CodeSandbox or StackBlitz for large front-end projects and Glitch or Repl.it for back-end or full-stack applications. Among the online editors described above, CodeSandbox is the most flexible when creating projects.
Hopefully, this article equipped you with first-hand information to choose the online editor that meets your needs.

